How Cold Process Soap Is Made, Step by Step
A plain walk through the cold process method, from measuring oils to weeks of curing, and why each step shapes how a handmade bar looks, lathers and lasts.

Key takeaways
- Cold process soap is made by mixing measured oils with a lye solution at moderate temperatures, then letting the reaction finish in a mold.
- Careful weighing and a small superfat of extra oil are what make a bar mild rather than harsh.
- Saponification is mostly complete within a day or two, but the bar then cures for about four to six weeks.
- Nothing about the method requires synthetic additives, which is why cold process is popular for chemical free soap.
Most people never see soap being made, so a handmade bar can feel a little mysterious. Here is how cold process soap is made, step by step, in plain terms. This is not a recipe or a how to for beginners (working with lye takes proper training and safety gear). It is a look behind the counter so you understand what you are buying, and why a good chemical free soap bar takes weeks to reach your shower.
Why It Is Called Cold Process
The name is a little misleading. The ingredients are not cold; they are often around room temperature to warm. "Cold" simply means no outside heat is used to cook the soap once the oils and lye are combined. The reaction makes its own warmth. This sets it apart from hot process, where the soap is cooked, and melt and pour, where a ready made base is melted. Our comparison of hot process vs cold process vs melt and pour soap covers the differences.
Step 1: Choosing and Weighing the Oils
Every bar begins with a recipe of fats and oils. Each oil contributes something: olive oil for mildness, coconut oil for big bubbles and cleansing, shea butter for a creamy, firm bar, castor oil to stabilize lather, avocado oil for a soft, conditioning feel. For a fuller comparison, see the best oils for soap.
Soapmakers weigh everything, usually to the gram. Cups and spoons are not precise enough, because the amount of lye has to match the oils closely.
Step 2: Calculating the Lye
Each oil needs a specific amount of sodium hydroxide to turn completely into soap. This figure is called its saponification value, and makers use a lye calculator to add it up for the whole recipe. Then they deliberately use a little less lye than the oils could absorb. That gap is called the superfat, often around 5 percent, and it means a small amount of oil stays unreacted in the finished bar. The superfat is a safety margin against leftover lye and part of what makes handmade soap feel conditioning. If you are curious about the chemistry, our guide on whether lye in soap is safe goes deeper.
Step 3: Mixing the Lye Solution
Wearing goggles, gloves and long sleeves, the maker slowly adds sodium hydroxide to water (always lye into water, never the reverse). The solution heats up quickly and gives off fumes for a moment, so this happens with good ventilation. It is then set aside to cool.
Step 4: Melting and Combining
Solid butters and oils like shea and coconut are gently melted, then combined with the liquid oils. When the oils and the lye solution are both at the maker's target temperature, which is commonly somewhere in the range of warm bath water, the lye solution is poured into the oils.
Step 5: Blending to Trace
Most makers use a stick blender. Within minutes, the thin mixture begins to thicken as soap molecules form and hold the oils in an emulsion. The point where drizzled batter leaves a faint trail on the surface is called trace. Light trace looks like thin custard; heavy trace looks like pudding.
Trace is the moment for extras. Essential oils, clays, ground botanicals or a swirl of natural colorant are stirred in here. Some ingredients speed up trace, so timing takes practice.
Step 6: Pouring and Insulating
The batter goes into a mold, often a wooden loaf mold lined with paper or a silicone liner. Many makers cover and insulate the mold so the soap heats up through its own reaction and goes through gel phase, when the center turns translucent and warm for a while. Gelled soap tends to have brighter colors and a slightly glossy look. Others prefer to skip gel for a softer, matte look. Both are fine.
Step 7: Unmolding and Cutting
After roughly 24 to 48 hours, the soap is firm enough to unmold and cut into bars. By this point most of the saponification has happened, but the bars are still soft and full of water. They are not ready to use.
Step 8: Curing
The cut bars are spaced out on racks with good airflow and left to cure, usually four to six weeks, and sometimes longer for high olive oil recipes. During the cure, water evaporates, the bar hardens, and the soap tends to become milder and longer lasting. We explain why this wait matters in soap curing: why good bars rest for weeks.
The Whole Timeline at a Glance
| Stage | Typical time | What is happening |
|---|---|---|
| Weigh, mix, blend to trace | About an hour | Oils and lye begin reacting |
| In the mold | 1 to 2 days | Most saponification, optional gel phase |
| Cut bars | Day 1 to 2 | Soft bars, high water content |
| Cure | 4 to 6 weeks or more | Water evaporates, bar hardens and mellows |
What This Means When You Shop
- Small differences between bars are normal. Handmade loaves vary a little in color, scent strength and texture. That is a sign of small batches, not a flaw.
- A thin white film can be harmless. Soda ash, a powdery layer that sometimes forms on top, is a cosmetic quirk, not a sign the bar is unsafe.
- Glycerin stays in. Because nothing is removed after the reaction, the natural glycerin remains. See why handmade soap feels different.
- Labels can be short. Oils, water, lye (or the saponified names) and a few gentle extras are all a cold process bar needs. Our guide on how to read a soap label helps you decode it.
- Ask about the cure. A maker who cures for several weeks usually knows their craft.
Why Cold Process Fits a Chemical Free Approach
The method itself needs nothing synthetic. There is no need for detergents, hardeners, preservatives or dyes. That is why most small batch makers who care about simple ingredients choose it. It is slower and less uniform than factory production, but the trade off is a bar you can fully understand.
At Lucky Lady Ranch, this is how every bar is made, in small batches, with a full cure. Our cold process Body Bar uses olive, coconut, shea, castor and avocado oils with essential oils, and our Beauty Bar for the face adds vitamin E, rosehip seed and prickly pear seed oil to the same gentle base.
From the ranch
Made in small batches, without the ingredients discussed above.
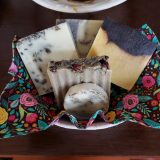 Body BarA true cold process soap for gentle, everyday cleansing.
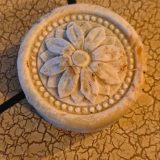 Beauty BarA gentle facial bar with rosehip, prickly pear and vitamin E.
Questions people ask
How long does cold process soap take to make?
Mixing and pouring take about an hour. The soap stays in the mold for one to two days, then cures for roughly four to six weeks before it is ready to use.
What is trace in soap making?
Trace is the point where the oil and lye mixture thickens enough that a drizzle leaves a visible trail on the surface. It signals that the oils and lye are emulsified and the soap can be poured.
Is cold process soap better than store bought soap?
It depends on what you value. Cold process soap keeps its natural glycerin and usually has a short ingredient list without synthetic detergents, fragrance or dyes, which many people prefer.
Can you use cold process soap right away?
It is not recommended. Fresh soap is soft, wears away quickly and can feel harsher. A cure of several weeks lets water evaporate so the bar becomes harder and milder.
Sources and further reading
- Kevin M. Dunn, Scientific Soapmaking: The Chemistry of the Cold Process
- Susan Miller Cavitch, The Natural Soap Book
- Anne L. Watson, Smart Soapmaking
- Handcrafted Soap and Cosmetic Guild, soapmaking safety guidance
This guide is for general education and is not medical advice. If you have a skin condition, allergy, or are pregnant or nursing, talk with your doctor or a board certified dermatologist about the products that are right for you.